eighteen weeks pregnant

  • Subscribe to our RSS feed.
  • Twitter
  • StumbleUpon
  • Reddit
  • Facebook
  • Digg
Affichage des articles dont le libellé est honey-sweetened. Afficher tous les articles

mardi 31 décembre 2013

Merry Minty Chocolate Peppermint Cake {grain-free & honey-sweetened}

Posted on 01:08 by Unknown


Hope you all had a wonderful Christmas and looking forward to a great New Year!

Did you miss me?

This pass month was a busy time of ministry, birthdays, family visiting and Christmas. So, I decided to take a step back from my blog and computer in general.

I really needed that break.


Now, I am slowly coming back. Not sure how often I will be blogging, but I want to take a different approach with my blog.

I want to try to write more about my life as a deaf missionary mama and share about other things besides food. I am even thinking about moving over to my own domain and stuff... soon, hopefully.

Okay, enough about me and the blog.

Let's talk about this cake...


Cool, creamy, minty, rich and so nourishing... this cake is simply divine, easy to make, loaded with healthy fats & protein and deliciously grain-free.

Plus, everything about this cake is, well... minty. The cake is minty, the frosty is minty and crushed peppermints topping it off, making it literally a "merry" minty cake.

I had so much fun making this cake... and eating the leftover frosting with crushed peppermints on a big spoon.

Oh, yes I did do that. Yum.

My mouth just tingles thinking about it!

I have to tell you that this frosting only requires THREE ingredients... butter, chocolate chips and peppermint extract. Or for those who need it to be dairy-free... thick full-fat coconut milk, chocolate chips (Enjoy Life is dairy-free) and peppermint extract.

Can you believe that?! Totally fail-proofed and guaranteed to whip up beautifully, oh yesss. That's my kind of frosting. 

To be honest, I typically shy away from making cakes and frostings. They never seem to turn out well for me, but I wanted to give it a go this time around because...


It was for my little man's 3rd birthday.

I had to try!

My girls' had lovely rainbow cupcakes for their birthdays this year and I didn't want him to feel that he wasn't special enough to have a cake too.

Plus, I am a baker, for crying out loud! I should be able to make a cake... and frosting!

Anyway...

He was so excited to have a birthday cake. He kept running up to me and saying, "that's MY birthday cake!" and "that birthday cake is for ME!"... then his face would light up with that adorable grin of his that simply melts my heart and I am so sure it will melt the hearts of many young latina girls in the not-so-distance future!


He was especially excited that I was making the cake using two of his favorite flavors... chocolate and peppermint.

Who doesn't love that combination?! Chocolate and peppermint are one of those matches made in heaven... along with chocolate & orange... chocolate & cherry... chocolate & almond...

Okay, pretty much everything tastes amazing with chocolate and my family loves anything with chocolate!

I even have a secret addiction to Trader Joe's variety of chocolate cover fruits and nuts... good thing I have enough self-control to buy only one box  (or two) when I am there once a year and live far enough away that I can't buy any on a regular basis. Ha!

Anyway, the peppermints I used for this cake are from Trader Joe's... brought down via my mother-in-law, but you can buy natural peppermints from this awesome Natural Candy Store. I am planning to doing a little shopping there this week! (psst- if you buy some candy through that link... I will get a $5 gift certificate to buy some candy for my kiddos! Thanks!)


Okay, enough about the chocolate and peppermint.

There are a few other ingredients that really takes this cake up a few more notches, nourishing-wise...

Coconut flour.

Eggs.

And butter. Lots of butter.

All three ingredients required for a growing little man to keep him strong, healthy and smiling that adorable grin.


Now, I think it's time to head into the kitchen and make another one of these double-layer Merry Minty Chocolate Peppermint Cake for our New Year celebration... you should do the same. I'm sure you have some leftover peppermint candies lying around that need to get used up  ;)


Merry Minty Chocolate Peppermint Cake
(grain-free & honey-sweetened)

3/4 cup coconut flour
1/4 cup arrowroot powder
3/4 cup cacao powder
1 tsp baking soda
1/2 tsp baking powder
3/4 tsp sea salt
8 eggs
3/4 cup coconut oil or butter, melted (plus more for greasing pans)
1 cup honey
1/2 cup milk (regular or coconut)
1/4 cup strong coffee (or coffee substitute)
1 Tbsp apple cider vinegar or lemon juice
2 Tbsp peppermint extract
Chocolate Peppermint Frosting (recipe below)
Crushed peppermint candy

  1. Preheat oven to 350 degrees F.
  2. Grease two 9-inch cake pans and line the bottoms with parchment paper.
  3. Mix together coconut flour, arrowroot, cacao, baking soda, baking powder and sea salt in a small bowl and set aside.
  4. In the bowl of a stand mixer, with whisk attachment, whisk the eggs.
  5. Add oil/butter, honey, milk, coffee, ACV or lemon juice and peppermint. Continue to mix until combined.
  6. Add the dry ingredients into the wet ingredients and mix on low speed until ingredients are incorporated.
  7. Stop the mixer and scrap down the sides (you might need to do this a couple times).
  8. Turn mixer back on and beat on high speed for about one full minute to make the batter fluffy.
  9. Divide the batter between the two prepared pans.
  10. Bake for 25 to 30 minutes. Check at 25 minutes with a toothpick... it should come out with a few moist crumbles. Don't overbake or the cake will be dry. If it is still too moist, bake for another 2 to 5 minutes (the cake was perfect at 27 minutes for me).
  11. Allow to cool on a wire rack for about 10 to 15 minutes. Use a knife to loosen the sides of the cakes from the pans and turn them out onto the wire rack and allow to cool completely.


Chocolate Peppermint Frosting

2 cups chocolate chips
2 cups butter or full-fat coconut milk
2 tsp peppermint extract

  1. In a medium saucepan, melt chocolate chips and butter over medium low heat. Stirring frequently to keep from burning.
  2. When melted, turn of heat and stir in peppermint extract.
  3. Let it cool completely and chill in the fridge until solid.
  4. Remove from fridge and allow it to come to room temperature. You will have to eye-ball this as you don't want it too warm that it becomes more of a gooey mess, but you don't want it too firm that it just balls up inside the whisk.
  5. Scoop the mixture into a mixing bowl and beat on medium for about 2 minutes or until light in color and fluffy.

Using coconut milk:
Chill can of full-fat coconut milk in the fridge overnight. When ready, open can and pour off the water (save it for smoothie or toss out). Scoop only the solid white coconut cream into a medium pot. Add the chocolate chips and follow the instructions listed above.


Putting together the cake (the fun part!):

  1. Carefully move one of the cakes unto a serving plate of your choice.
  2. Top it thickly with Chocolate Peppermint Frosting and sprinkle with crushed peppermint candy (don't be shy with this!).
  3. Carefully put the second cake on top and top it off with the rest of the frosting.
  4. Sprinkle more crushed peppermint candy.
  5. Enjoy!


Have a wonderful New Year!

This post is part of the Nourishing Progressive Dinner for the Holidays. Please check out what these bloggers have whipped up for this special event! 


This post may contain affiliate links. If you purchase a product through an affiliate link, your cost will be the same but I will receive a small commission. The commissions I receive goes to support my family, our ministry and helps keep my blog going. Thank you for your willingness to use the links to support us & help me keep Just Making Noise going!


Read More
Posted in chocolate, chocolate cake, chocolate peppermint cake, coconut flour, easy frosting, grain-free, honey-sweetened, peppermint | No comments

vendredi 27 septembre 2013

Grain-free Apple Elderberry Crumble Cake {A Flu Buster Dessert!}

Posted on 20:26 by Unknown


Today I am over at the Bulk Herb Store Blog sharing my flu buster dessert! 

I love the Fall and apple season! I thought it would be different and yummy to make an apple crumble cake with elderberries.

To be honest, I have never baked with elderberries and was a little worried that the cake would turn out a flop.

Thankfully, it turned out moist, delicious and surprisingly rich with a nice tart kick.

Head over there, enjoy more pictures and get the recipe for the Grain-free Apple Elderberry Crumble Cake!


Plus, learn about the amazing elderberry's flu busting qualities!


Read More
Posted in apples, Bulk Herb Store, elderberries, grain-free, honey-sweetened | No comments

lundi 16 septembre 2013

Delicious Lime Creamsicles (honey-sweetened & dairy-free)

Posted on 12:23 by Unknown


Hello friends! We are back in the states for our two month furlough and it seems that summer doesn't want to lose its grip around here just yet.

During our first week in Iowa we experience temperatures up to the 100s and it was pretty humid. Ugh.

Then, we were in Arizona visiting churches and friends... yes, it was HOT there, but thankfully not humid. We enjoyed the pool every morning with the kids and cooling down with cold or frozen fruits and smoothies.

Now, we are in Southern California and the last few days have been in the lower 90s.

Goodness, summer is sure hanging on! But I've got something to share with you that will cool off the day nicely...


Creamy, rich Lime Creamsicles. Perfect for hot days and so easy to make and... and... and...

so tanglicious!

Plus, they only call for 3 ingredients!

I also love the vivid green color. Totally natural... no food coloring in my kitchen!

Maybe you might've already guessed what the main ingredient is.


Yes. Avocado.

I love avocados.

They are creamy. Rich in good fats. A great snack and there is so much you can make with avocados!

Remember, avocado is a fruit. So, technically it should be used like a fruit to make sweet stuff like Aquacate del Chocolate (diary-free chocolate pudding), Lime Mousse, smoothies and ice cream, but it is great for savory things like Avocado Gazpacho too!


I've made them several times and everyone loves them! Really, they are super easy to make and SO refreshing!

Summer is holding on for a little while longer so it is best to enjoy it with some tanglicious lime creamsicles while you can!!


Lime Creamsicles
(honey-sweetened & diary-free)

1 cup water
1/4 - 1/3 cup honey
3 ripe avocados
4 - 6 Tbsp fresh lime juice
zest of one lime
pinch of sea salt

Add in water, 1/3 cup of honey and avocados into a blender or food processor. Puree until smooth.

Add in 1/8 cup of fresh lime juice and sea salt. Puree until just combined.

Taste the mixture and add in more honey and/or lime juice until it is to your liking.

Scoop into popsicle molds or cups with sticks. Freeze until solid (about 5 hours).

Enjoy!


Read More
Posted in avocados, dairy-free, honey-sweetened, limes, popsicles, wholesome snacks, wholesome sweets/desserts | No comments

vendredi 9 août 2013

Coconut Blackberry Lime Ice Cream

Posted on 22:50 by Unknown


I really love coconut lime ice cream... the combination is a great balance of nutty, sweet and tangy. I've always made this sorbet version of coconut lime, but decided to change it up a little bit now that I don't make coconut kefir much anymore.

I also have a ton of blackberries sitting in my freezer, grown from my own bushes. I knew throwing in some would create some beautiful colors and take the tanginess up a notch.


To be honest, I am more of a throw-it-together and pour into the ice cream machine kinda gal. Don't get me wrong, I love making the custards... but there are days where I just rather be spontaneous!

Naturally, I am a very spontaneous person... ask my hubby. It used to drive him crazy, but now he loves it because it is in my moments of spontaneous-ness that I make the best meals and desserts.

Especially ice cream  :)


And because of my spontaneous personality... having the Smart Scoop has been very handy with no need to pre-freeze the container. All I gotta do it push that 'power' button, hit the pre-cool  while mixing together the ingredients and I am good to go!

I am sure you are wondering if I actually used that coconut (in the picture above) to make ice cream. For this one, no... but I have in the past and it is SO worth the extra work!!

In fact, I think I will do that today!! Pound out a couple coconuts and make some pina colada... how does that sound?!


Coconut Blackberry Lime Ice Cream

2 cups coconut milk
1 cup regular milk (or coconut milk)
2-4 Tbsp lime juice (depends on how tangy you want it)
1/2-3/4 cup honey
zest of 1 lime
pinch of sea salt
1 cup chopped blackberries (fresh or frozen)

Mix together everything except the blackberries. Whip it until the honey dissolves completely. Pour into ice cream machine and follow the instructions that come with the machine.

When ice cream is done, you can either throw in the blackberries and give it a few whirls in the machine OR scoop out the ice cream into a container and fold in the blackberries.

Serve right away or let it firm up in the freezer. If you have a Smart Scoop, you know you won't have to firm it up if you set it on 'ice cream' setting. It will scoop right out of the machine! Amazing!

Speaking of the Smart Scoop... have you entered for a chance to win this baby???


Read More
Posted in honey-sweetened, ice cream, wholesome sweets/desserts | No comments

mardi 2 juillet 2013

Agua de Sandia {a refreshing watermelon drink}

Posted on 13:42 by Unknown


With the 4th of July just around the corner and a hot summer ahead, this is great timing to share my yummy watermelon drink.

Agua de sandia is an 'agua fresca' made in Latin America, but with LOTS of sugar. If you have visited Mexico or any Latin American country or walked into any taqueria, you will find many options for "aguas frescas" (refreshing drinks)... Agua de horchata, agua de jamaica, agua de pepino con limon, agua de tamarindo and the list goes on.

Here I am going to share with you how to enjoy agua de sandia using only honey to sweetened it, but if your watermelon is super ripe and sweet... you might not need to do that!


It is super easy to make and a fabulous way to use up all those juicy watermelons in season right now. Plus, it is perfect for making popsicles or you can freeze them in ice cube trays to use in smoothies later!

Speaking of popsicles, I shared one at The Nourishing Gourmet today. Using leftover agua de sandia, I made Paleta de Sandia y Frutas {fruit salad on a stick}. Please check it out! It is soooo good and great to share at a party!


This drink is so good that even my "watermelon-hater" husband loves it.

Yes, you read that right.

My hubby hates watermelon and cucumbers.... gags when he smells either one in my breath, but he LOVES agua de sandia.

Weird, right? He says its because of the honey, which he thinks makes the watermelon taste better and I have to agree that it does make it taste good... but I love watermelon, so I think having a fresh slice is just as good as having a drink of it!


Now, I hope everyone will have a wonderful 4th of July celebration! To be honest, we haven't been able to have a real 4th of July celebration since moving to Honduras about 4 years ago.

Sometimes I miss the gatherings, fellowship, good food and the fireworks. My oldest girl even asked me if we will ever see some real fireworks (she was only 2 the last time we saw fireworks, which was in Costa Rica).

One day, hopefully... I told her.

Once in a while we have fireworks popping around for wedding celebrations or holidays in the community we live in, but they are truly pathetic and mostly for noise then for show. Plus, they often set them off in broad daylight! Huh?

It would be so fun for my kids to see some serious fireworks exploding in the dark sky. One day, hopefully!

Now, go whip up some Agua de Sandia (or make some Paletas de Sandia y Frutas) and enjoy the fireworks!


Agua de Sandia (Watermelon Drink)

1/2 medium watermelon, diced
1 cup water
1/8 - 1/3 cup honey
5-10 drops of stevia, optional
pinch of sea salt

Put diced watermelon and water in blender. Blend on high for several seconds.

Add honey (start with 1/8 cup) and blend. Taste and add more honey, if desired, and sea salt. Add stevia if desired. Blend for a few seconds.

Pour the watermelon drink through a fine sieve and put in the fridge to chill.

Before serving, shake it well and enjoy as it is or over ice.

What are some of your favorite 4th of July traditions??


Read More
Posted in agua de sandia, honey-sweetened, natural drinks | No comments

jeudi 27 juin 2013

How to Make Horchata (naturally sweetened)

Posted on 19:28 by Unknown


Hello friends!

Today I am sharing my naturally sweetened Agua de Horchata at the Grain Mill Wagon.

I thought some of you might enjoy a visual step-by-step of how to make horchata. I won't be sharing the exact measurements, but you can get the recipe over there.

It's SO easy and a great summer drink!


First, you need to grind up your rice. If you don't have a grain mill, a coffee grinder or blender will work just fine.

You can use brown rice or white rice. I prefer either white basmati or regular brown rice. Obviously, the flavor will be different using one or the other.

Next pour your rice flour into a bowl, throw in a cinnamon stick or two and cover with warm water.

Let it sit for up to 6 hours or overnight. You can leave it out or put it in your fridge.


Next, pour the rice mixture in a blender and blend on high for several minutes. You want it to be smooth, not gritty.


Then pour the mixture into a strainer. It is best to use a fine sieve, but you can also use a cheesecloth. I have done both, but find the cheesecloth a little more difficult to use.

Using a spoon or your hands, firmly press the rice & cinnamon solids to get out as much of the liquid as possible, but don't press too much if you are using a fine sieve without a cheesecloth... some rice will pass through.

Add in honey and stevia... whisk vigorously until honey completely dissolves. No need to warm it up or warm up the milk!

Stir in your choice of milk. We use raw goat's milk and love it, but we have used coconut milk with great results!

Pour into a pitcher and let it chill in the fridge for a few hours.


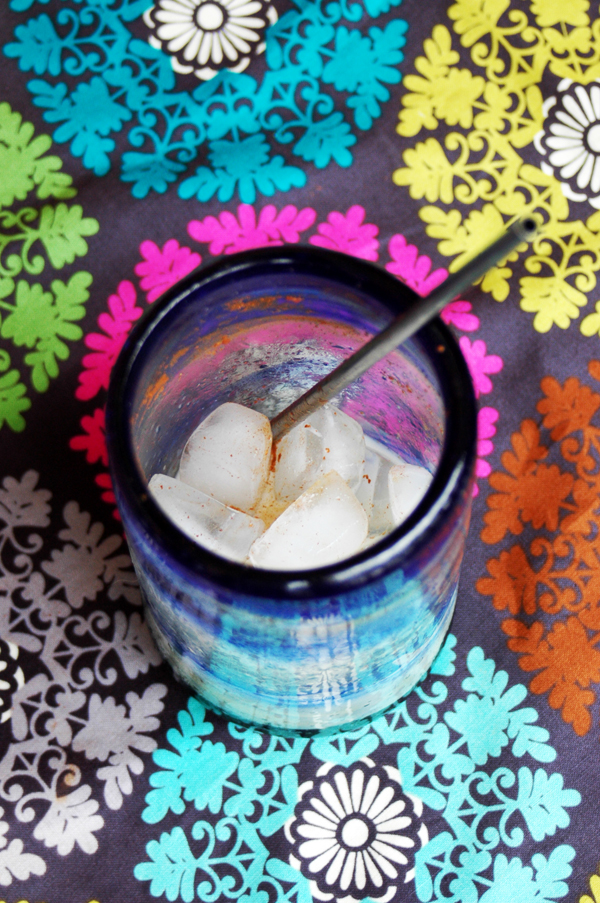
Pour Horchata into a tall glass full of ice. Yes, you must have a straw! Bought my stainless steel straws on Amazon.


Sprinkle ground cinnamon on top.


Sprinkle MORE cinnamon on top!


Slurp it down and enjoy the cool, delicious taste. (Oops, forgot to put cinnamon on that one!)


Buen Provecho!! Get the Agua de Horchata recipe and make some today!

Pretty easy, right? Have you made Horchata? What about using different flavors?

This post may contain affiliate links. If you purchase a product through an affiliate link, your cost will be the same but I will receive a small commission. The commissions I receive goes to support my family, our ministry and helps keep my blog going. Thank you for your willingness to use the links to support us & help me keep Just Making Noise going!


Read More
Posted in cinnamon, honey-sweetened, horchata, natural sweeteners, raw milk | No comments

mardi 11 juin 2013

Honey-sweetened Mango Curd (w/ dairy-free option)

Posted on 23:18 by Unknown


Okay, I might as well just say it... why embarrass myself playing 'clueless' or wait until someone says something?

I just realized that I missed a letter on the title in the picture banners... guess which one it is?

Anyway, it is fine... I am not going to fix it. I will just leave it and let you all have a good laugh  :)

Funny how things like that can happen. I could've gotten all upset over it, but nah... it is not worth it.

Perfection is overrated. Seriously.

Here you are seeing my normal, human imperfection and I am proud to display it to the world.

I know, it's only one letter.

But that one letter can have the power to either cause me emotional distress or a good laugh  :) 

I choose the latter.


Anyway, let's talk about the curd... does it look so good?!

Back when I made the orange curd... I knew I had to try making a curd with mango.

I had my chance. I am truly not disappointed. I am not exaggerating. I am honestly in love with this curd!

Creamy, luscious and tangy... this curd is fantastic all by itself.

After making my first of many batches and it cooled down & thicken. I had one bite, then another, another, another and another... I could not stop eating it!


Even though I loved eating it all by its beautiful self... I decided to try it over some of that yummy cake in the picture up there.

It was so good... so so so good!

The cake is unique, at least for me, because it is made with 100% sorghum flour. This is the first time I have ever tried baking with this flour.

Most of you know I like to use mostly coconut flour for my gluten-free baking. Once I even made a gluten-free dessert with almond flour and coconut flour.

This has been a totally new and fun experience for me. Oh, and did I mentioned that the cake's second main ingredient is mango? Do I need to say more?!

If you are interested... head over to the Grain Mill Wagon and print out the recipe or Pin it for later. The Mango Cake is super easy to make and gluten, dairy & sugar free! 

Wait! Before you do that... you should make some this awesome mango curd to slather on the Mango Cake... if you decide to make it (wink).


Honey-sweetened Mango Curd
spread over Mango Cake

1 1/2 cups mango puree (about 1-2 mangoes)
3 large eggs or 6 egg yolks
1/8 cup honey
4 Tbsp fresh lime juice
1/4 cup of butter or coconut oil


In a medium saucepan, whisk together mango puree, eggs, honey & lime juice until smooth.

Add in slices/chunks of butter (or coconut oil). Cook over medium heat and whisk until smooth.

Continue to cook & whisk until the mixture thickens and you start to see bubbles popping on the surface.

Remove from heat and pour into a fine sieve set over a bowl. Gently stir the curd through the sieve.

Cover the bowl and store in the fridge for several hours to thicken.  Should keep for about one week in the fridge.

Enjoy it by itself or slather it on Mango Cake or make curd bars!


Read More
Posted in curd, diary-free, honey-sweetened, mangos, wholesome sweets/desserts | No comments
Articles plus anciens Accueil
Inscription à : Articles (Atom)

Popular Posts

  • Pregnancy Notes: Postpartum Herbal Sitz Bath {recipe}
    Herbal sitz baths are extremely soothing, relaxing, healing  and a  great way to pamper a new mama after going through the tiring workout o...
  • Contact
    Please contact me if you... Have any questions. Want to be a part of Sweet Wholesome Wednesday . Would like me to review a book or products ...
  • About A Deaf Mama
    Ears to hear and eyes to see—both are gifts from the Lord. Proverbs 20:12 Hello! My name is Marillyn Beard and I am married to a wonderful G...
  • Can You Have Dessert for Breakfast?!
    Okay, this is not a dessert, but it sure LOOKS like it! I'm not the kind of mama that feeds her family sugar for breakfast. Who says yo...
  • Pumpkified Mousse {a Sugar-free, Candida-Diet Dessert for Fall}
    ( photo credit ) Note from Marillyn:  During the months of September and October you will be seeing several good blogger friends to do guest...
  • Sweet Wholesome Wednesday: Spicy Ginger Snaps
    Can't believe it's Wednesday already! Whew! Did you all get a chance to look at Divina's Coconut Macaroon Tart last week?? Wow...
  • Possibly World's First: Homemade Crunchy {grain-free} Roasted Chickpea Cereal!
    Remember my post a while back about our new favorite snack ? Those crunchy, delicious little balls that are so healthy & addictive?! Wel...
  • Let's Celebrate National Ice Cream Month {Giveaway & Discount!!}
    I almost forgot about National Ice Cream Month!! Yes, me... the ice cream queen, almost forgets a very important event... tsk tsk. Well, I h...
  • Catching Up & News!
    I'm finally getting back into the world of blogging, but... I have to be honest... I did not miss blogging. Not one bit. Believe me, bl...
  • You've Got Ice Cream Questions? I've Got Answers!
    Ever since I first published the ice cream ebook ... I have been asked question after question from those who were wanting to buy the book,...

Categories

  • 7 Day Real Food Challenge
  • adobe house
  • advent
  • agua de sandia
  • almonds
  • aloe vera
  • Alternative Laundry Series
  • apples
  • avocados
  • babies
  • babywearing
  • baked oatmeal
  • bakes oatmeal
  • beans
  • beef tongue
  • beef tongue recipes
  • Berkey products
  • birth DVDs
  • birth story
  • birthdays
  • blackberries
  • Blendtec
  • blog awards
  • body scrubs
  • bones
  • book reviews
  • books
  • Bookworm Reports
  • breakfast
  • breastfeeding
  • Bulk Herb Store
  • Bundle of the Week
  • busy life
  • butter
  • butter oil
  • butternut squash
  • Caribbean Adventures
  • chickens
  • chickpeas
  • childbirth books
  • chocolate
  • chocolate cake
  • chocolate peppermint cake
  • Christian books
  • Christmas
  • Christmas gifts
  • cinnamon
  • citrus fruit
  • cloth
  • cloth diapers
  • cloth pads
  • cloth wipes
  • coconut flour
  • coconut oil
  • coconut palm sugar
  • coconuts
  • comfort food
  • cookbooks
  • cookies
  • cranberries
  • crock pot
  • cultured dairy
  • curd
  • curd bars
  • dairy-free
  • deaf
  • December Photo Project
  • December Photo Project 2011
  • dehydrated orange slices
  • dehydrating sourdough
  • dehydrator
  • desserts
  • diary-free
  • dried orange chips
  • easy frosting
  • ebook
  • eBook Bundle
  • ebook discount
  • egg yolks
  • elderberries
  • essential oils
  • fall recipes
  • family
  • FAQs
  • farmer's markets
  • fermented cod liver oil
  • Fight Back Fridays
  • filtered water
  • fluoride
  • food news
  • Foodbuzz
  • foodie fights
  • Foodista
  • free stuff
  • frugal meals
  • frugal snacks
  • garbanzo beans
  • gardening
  • garlic
  • giveaways
  • gluten-free
  • GMOs
  • GNOWFGLINS Dehydrating Class
  • GNOWFGLINS e-Course
  • grain-free
  • group b strep
  • guest post
  • handmade
  • Harvest Your Health Bundle Sale
  • He is risen
  • healthy fats
  • healthy nuts
  • healthy postpartum
  • Hello Morning Challenge
  • herbal medicine
  • herbal remedies
  • herbal sitz bath
  • herbs
  • homebirth
  • homemade
  • homemade candy
  • homemade cereal
  • homemade chorizo
  • homemade extracts
  • homemade mayonnaise
  • homemade snacks
  • homemade snacks. traveling
  • homemade sourdough tortillas
  • homemade tea
  • homemade trail mix
  • homemade vanilla
  • homemade wipes
  • Homemaking eBook Bundle Sale
  • homeopathy
  • homestead
  • homesteading
  • Honduras
  • honey
  • honey-sweetened
  • horchata
  • ice cream
  • ice cream pie
  • Italian Drip Sandwich
  • Jesus
  • JMN videos
  • Just Making Ice Cream
  • kefir
  • kelp
  • kitchen gadgets
  • labor and birth
  • lacto-fermented food
  • Life
  • life in Costa Rica
  • life in Honduras
  • limes
  • loose herbs
  • make it yourself
  • mangos
  • marmalade
  • missionaries
  • missionary life
  • MIY
  • movie
  • mud house
  • muffins
  • my faith
  • my family
  • my story
  • Naomi
  • natural birth
  • natural deodorant
  • natural drinks
  • natural home alternatives
  • natural living
  • natural nipple cream
  • natural postpartum care
  • natural pregnancy
  • natural preventative care
  • natural remedies
  • natural sweeteners
  • naturally sweetened sweets
  • Nourished Kitchen e-course
  • Nourished Living Network eBook Bundle
  • nourishing ingredients
  • nourishing ways
  • nursing
  • nursing tea
  • nut & seed
  • nut-free
  • oatmeal
  • oatmeal bake
  • odd bits
  • orange powder
  • orange season
  • oranges
  • Organics in Costa Rica
  • organize
  • Other Things
  • paleo/primal eBooks
  • palm shortening
  • pancakes
  • pecans
  • Pennywise Platter Thursday
  • peppermint
  • perserving naturally
  • photography
  • phytic acid
  • pie crusts
  • Poema
  • popsicles
  • porridge
  • postpartum books
  • potpourri
  • prayer needs
  • pregnancy
  • pregnancy books
  • pregnancy exercises
  • pregnancy health
  • Pregnancy Notes Series
  • pregnancy tea
  • preserving sourdough
  • preventing group b strep
  • probiotics
  • pumpkins
  • quiet time
  • raw apple cider vinegar
  • raw food
  • raw milk
  • Real Food
  • real food article
  • Real Food Face-Off
  • Real Food Media
  • Real Food Wednesday
  • real salt
  • recipe round-up
  • recipes
  • restaurant reviews
  • reviews
  • RO4Y
  • rolled oats
  • sea salt
  • simple life
  • Simple Lives Thursday
  • simple tips
  • slow cooker
  • smoothies
  • soaked nuts
  • soaking grains
  • soaking nuts
  • soups
  • sourdough
  • sourdough biscuits
  • sourdough cake
  • sourdough cinnamon rolls
  • sourdough cookies
  • sourdough cornbread
  • sourdough eCourse
  • sourdough english muffins
  • sourdough focaccia
  • sourdough journal
  • sourdough pizza
  • sourdough pot pie
  • sourdough starter
  • special guests
  • spirulina
  • stevia
  • sugar-free
  • superfood for pregnancy
  • supplements
  • Sweet Wholesome Wednesday
  • Tabitha
  • tea
  • thankfulness
  • Tobias
  • top posts
  • tortilla pizza
  • traditional food
  • travel snacks
  • traveling
  • Tuesday Twister
  • tutorial
  • Tyndale book reviews
  • Ultimate Homemaking Bundle Sale
  • walnuts
  • WAPF
  • WAPF food
  • Weekend Herb Blogging
  • whole food supplements
  • whole grains
  • wholesome
  • wholesome cookies
  • wholesome eating
  • wholesome snacks
  • wholesome sweets/desserts
  • winners

Blog Archive

  • ▼  2014 (12)
    • ▼  mai (3)
      • Pregnancy Notes: Postpartum Herbal Sitz Bath {recipe}
      • Pregnancy Notes: DIY Natural Nipple Cream {recipe}
      • Making the Adobe Bricks
    • ►  avril (7)
    • ►  janvier (2)
  • ►  2013 (50)
    • ►  décembre (1)
    • ►  novembre (3)
    • ►  octobre (7)
    • ►  septembre (3)
    • ►  août (4)
    • ►  juillet (2)
    • ►  juin (3)
    • ►  mai (8)
    • ►  avril (5)
    • ►  mars (6)
    • ►  février (5)
    • ►  janvier (3)
  • ►  2012 (41)
    • ►  décembre (6)
    • ►  novembre (3)
    • ►  octobre (1)
    • ►  juillet (6)
    • ►  juin (6)
    • ►  mai (4)
    • ►  avril (1)
    • ►  mars (2)
    • ►  février (5)
    • ►  janvier (7)
  • ►  2011 (82)
    • ►  décembre (19)
    • ►  novembre (1)
    • ►  septembre (2)
    • ►  août (7)
    • ►  juillet (9)
    • ►  juin (9)
    • ►  mai (11)
    • ►  avril (13)
    • ►  mars (4)
    • ►  février (4)
    • ►  janvier (3)
  • ►  2010 (30)
    • ►  décembre (1)
    • ►  avril (5)
    • ►  mars (3)
    • ►  février (19)
    • ►  janvier (2)
  • ►  2009 (134)
    • ►  décembre (21)
    • ►  novembre (15)
    • ►  octobre (13)
    • ►  septembre (10)
    • ►  août (17)
    • ►  juillet (12)
    • ►  juin (19)
    • ►  mai (13)
    • ►  avril (9)
    • ►  mars (5)
Fourni par Blogger.

Qui êtes-vous ?

Unknown
Afficher mon profil complet